The MASV Desktop App lets you automate file transfers. Create MASV Watch Folders to automate upload workflows--any files or folders you drop in a Watch Folder are uploaded directly to recipients or to a Portal. You can also automatically download files uploaded to a MASV Portal.
This page includes the following topics:
Download from Portal automations
About MASV Automations
You can create no-code automations to upload and download files by using the MASV Desktop App. For example, you can set up a Watch Folder on your Desktop or in a shared folder that your Team can access. Each time someone drops a folder (or file, if this option is selected) into the Watch Folder, the MASV Desktop App automatically sends the content as a package. MASV also notifies recipients when the package is available for download. You can take it one step further by setting up a Download from Portal automation, so you or your recipients don't need to manually download the files--an automation takes care of it.
Note: Please make sure you install the latest version of the MASV Desktop App.
You can choose from a range of settings when you set up an upload automation, including frequency of action, what happens to files after they have been sent, what to send (individual files or folders with files), what to ignore, as well as the all the standard Send or Send to Portal settings (recipients, message, storage, and more). For Download from Portal automations, you can select the Team, Portal, destination, and start date and time for downloads.
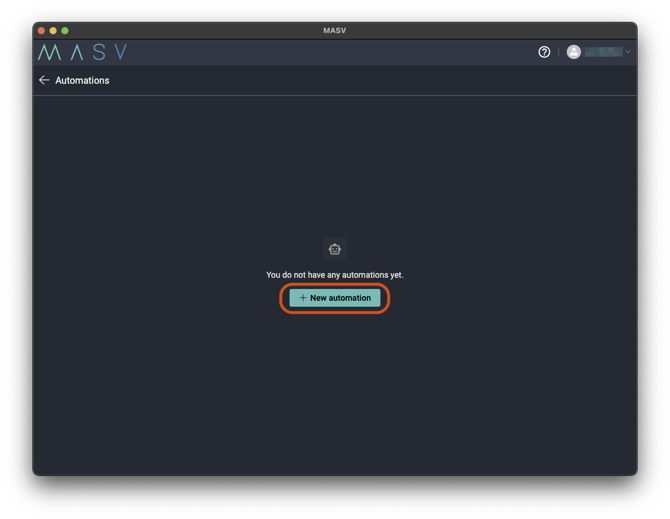
You can create automations in the MASV Desktop App. Select Automations to view existing or create new automations.
Note: You cannot transfer automations from one computer to another. Recreate the automations on the new system, ensuring that only one set of automations is active at any one time to avoid duplicating downloads.
Manage automations
After you create an automation in the MASV Desktop App, you can manage the automation from the Automations page. For example, you can view, edit, delete, and toggle automations on or off.
To manage automations in the MASV Desktop App
- In the MASV Desktop App, select the Automations button. A list of current automations displays.
-
On the Automations page, do any of the following:
-
Turn automation on or off: Select the toggle button to the left of an automation. The automation is off when the toggle is grayed out.
-
Edit an automation: Select the Edit icon [pencil] to open the automation setup windows, make the edits you want, and select Save.
-
Delete an automation: Select the red X in the Actions column, select Yes to confirm the deletion.
-
Send automations
As a MASV account Owner or Admin, you can set up a Watch Folder for your MASV Team. Files added to the Watch Folder will automatically be uploaded to MASV and the recipients you specify will be notified when the files are ready to download.
To create a Send automation with a Watch Folder
- In the MASV Desktop App, select Automations, and then select New automation.
- In the New automation window, select Send in the list of automation types.
- On the Watch folder setup page, specify the following required information and any optional settings:

- Automation Name: A custom name for your automation. This name will be displayed under the Automations list menu.
- Team: The Team under which you want to set your automation.
- (Optional) Teamspace: If using Teamspaces, select a Teamspace to limit access to the packages.
- Watch folder: Browse to or create the folder that you want to use as a Watch Folder.
- (Optional) Send growing files: Enable if you want to send in-progress files. For more information, see How to send Growing Files.
- (Optional) Select Settings and specify any of the following settings:
- Set the wait time after files are added to the watch folder before transferring: Specify a value (in minutes) to allow the system to finish copying files into the Watch Folder before MASV Desktop App starts uploading. Increase the default time if you expect to drop extra-large files or folders into a Watch Folder or if you have a slow network. This will avoid upload errors.
- Delete files from watch folder after transfer: Select the checkbox to delete the files or folders inside the Watch Folder automatically after they have been successfully uploaded.
- Send individual files: Select the checkbox if you want to trigger the Send automation each time a file is added to the Watch Folder. By default, the checkbox is not selected and only folders will trigger the Send automation.
- Ignored files and paths: Specify the files, file types, or paths that you want the automation to ignore (won't be sent in a package). You can use glob patterns to exclude content. For example, to exclude text files from the Watch Folder root and within any folders, you can use **/*.txt. By default, MASV ignores the following files: desktop.ini, .DS_Store, .fcpcache.
- Select Continue.
- On the Info page, fill in the following required fields and modify any of the optional settings:

- Recipient Email Address: The email address(es) of the people you want MASV to notify when the Watch Folder content is available for download. Max. 30 (or account limit).
- Package Name Suffix (optional): Adds a suffix to the package name (folder's name).
- Message (optional): A note that will be visi
ble to the recipient in the notification email as well as the download page. - Tag (optional): Add a custom tag to help you find and organize packages and billing.
- Download Limit: The maximum number of times the recipient is allowed to initiate the download of the received package from this Watch Folder.
- Storage duration: You can set a custom expiry date for all the packages sent through this Watch Folder. When packages expire, they are deleted from MASV. Note: Extended Storage fees apply beyond the free storage days included with your plan. If you don't want to set an expiry date, select Enable unlimited storage.
- Download Password: If filled, the recipients will need to enter this password on the download page before they can download the package.
- Priority: Determines the priority for sending the packages added to this Watch Folder versus other transfers.
- Select the Create button. Your Watch Folder Automation is ready to use and appears in your Automations list.
Important: Each folder (or file, if you enable this option), is uploaded as a separate package, so if you have several folders and files to be sent as one package, please make sure that you put all of them in a single folder before you add the content to the Watch Folder.
Note: When a folder is processed, the folder name that you see in the Watch Folder will change based on the status of the MASV process (uploading/complete).
Send to Portal automations
If you frequently upload to MASV Portals and want to save time, set up a Send to Portal automation.
Custom metadata in automations
If an automation uses a Portal that includes a metadata form, you can fill in the values for the metadata fields when you create the automation. The same metadata is used for all files or folders that you drop into the watch folder unless you manually edit and resave the values for the automation before you add more files or folders.
If the Portal owner updates the metadata form associated with the Portal, the changes are automatically updated in the MASV Desktop App. If the update includes one or more new required fields, the next time you run the automation, an error message displays and the automation is turned off until you edit the automation so it includes values for the new required fields. You can then turn the automation back on to resume transfers.
Note: Automations are not compatible with Portals for which you have applied Upload Rules.
To automate Send to Portal
- In the MASV Desktop App, select Automations, and then select New automation.
- In the New automation window, select Send to Portal in the list of automation types.
- On the Watch folder setup page, specify the following required information and any optional settings:

- Automation name: A custom name for your automation. This name will display under the Automations list menu.
- Portal Link: Enter the URL that you created or received from the Portal owner. Tip: You can copy the Portal URL from the MASV Web App > Request Files with Portals page. Select a Portal, in the Actions column, click the icon and choose Copy Portal Link.
- Watch folder: Select a folder on your computer or a shared network drive that you want MASV Desktop App to upload from.
- (Optional) Send growing files: Enable if you want to send in progress files. For more information, see How to send Growing Files.
- (Optional) Select Settings and specify any of the following settings:
- Set the wait time after files are added to the watch folder before transferring: Specify a value (in minutes) to allow the system to finish copying files into the Watch Folder before MASV Desktop App starts uploading. Increase the default time if you expect to drop extra-large files or folders into a Watch Folder or if you have a slow network. This will avoid upload errors.
- Delete files from watch folder after transfer: Select the checkbox to delete the files or folders inside the Watch Folder automatically after they have been successfully uploaded.
- Send individual files: Select the checkbox if you want to trigger the Send automation each time a file is added to the Watch Folder. By default, the checkbox is not selected and only folders will trigger the Send automation.
- Ignored files and paths: Specify the names or paths that you want the automation to ignore (won't be sent in a package). You can use glob patterns to exclude content. For example, to exclude text files from the Watch Folder root and within any folders, you can use **/*.txt. By default, MASV ignores the following files: desktop.ini, .DS_Store, .fcpcache.
- Select Continue.
- On the Info page, fill in the required fields and specify the settings you want:
- Your Email: The email address of the Portal uploader.
- Package Name Suffix (optional): Adds a suffix to the package name (folder's name).
- Message (optional): A note that will be visible to the recipient in the delivery email as well as the download page.
- Priority: Determines the priority for sending the packages added to this Watch Folder versus other transfers.
- Custom fields: If the Portal includes a Custom Form (Metadata Form), fill in the corresponding fields. Note: All packages that you send using this automation will include the same metadata information. If you need users to provide unique metadata for each transfer, do not use an automation.
- Select Create. Your Watch Folder Automation is ready to use and appears in your Automations list.
Download from Portal automations
You can create an automation in the MASV Desktop App to download packages that have been uploaded via a MASV Portal. This eliminates the need for recipients to manually download packages, saving time and the need for recipients to monitor when a package is ready to download. You can take it a step further and automate downloads for all Portals in your Team by selecting the All Portals option.
 To automate a download from a Portal
- In the MASV Desktop App, select Automations, and then select New automation.
- In the New automation window, select Download from Portal in the list of automation types.
- On the Destination setup page, specify the following required information and any optional settings:
- Automation name: A custom name for your automation. This name will be displayed under the Automation list menu.
- Team: From the drop-down menu, select the Team to which your target Portal(s) belongs to.
- Portal: From the drop-down menu, choose the Portal you want to download from.
- All Portals: Select this checkbox if you want to download from all Portals for the selected Team. When selected, by default the Create a parent folder for every Portal checkbox displays and is selected. This option helps organize packages according to which Portal was used for the transfer.
- Destination folder: Browse to or create a destination folder for the downloaded packages.
- (Optional) Create a parent folder for every package: Select this checkbox if you want to create a folder for each package. If not selected, the files and folders will be delivered without a container folder (will have the same structure that they had when uploaded to MASV).
- Download packages starting from: Select a start date and time. Packages delivered via the Portal before this setting will not be downloaded automatically.
- Priority: Determines the priority for downloading packages added to this Watch Folder versus other transfers.
- Select Create. Your Download from Portal Automation is ready to use and appears in your Automations list.
If you have any questions, feel free to contact us at support@masv.io.