Note: Please refer to the Okta documentation for the latest instructions for setting up SSO for applications using SAML. The instructions below are meant as a general guide and might not reflect the latest changes in Okta. For detailed instructions about setting up SSO in MASV, see How to set up single sign-on (SSO) in MASV.
Creating a SAML Application in Okta
- Ensure you are logged into your admin page in Okta.
- Navigate to Applications using the side navigation.
- Select Create App Integration. A window should open.
- Select SAML 2.0 as the integration type. You should be redirected to the integration setup page.
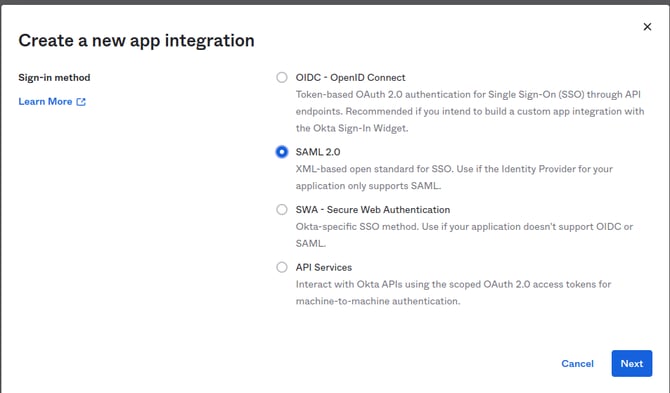
- Give your application a name. For example, MASV.
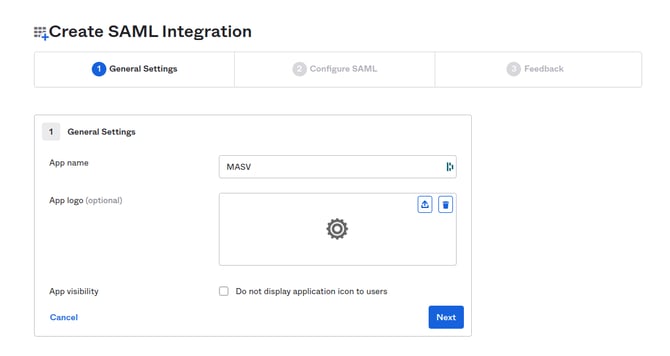
-
Select Next.
-
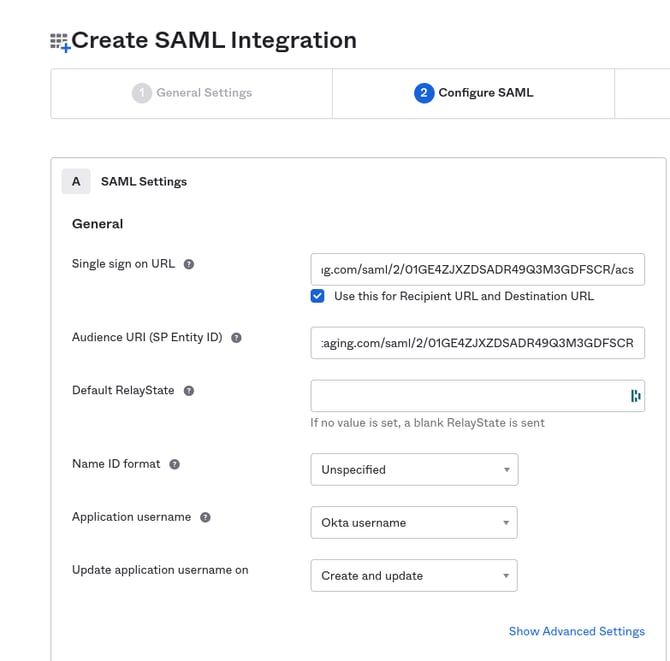
You are prompted to enter the single sign-on URL and Audience URI (SP Entity ID). You can copy this information from your MASV SSO Settings page if you've already verified your domain in MASV.
- Copy the ACS URL value from your MASV SSO Settings page and paste it into the Single sign-on URL field in Okta.
- Copy the SP Entity ID value from your MASV SSO Settings page and paste it into the Audience URL (SP Entity ID) field in Okta.
-
Select Unspecified as the value of Name ID format.
-
Select Okta username as the value of Application username.
-
Select Create and update as the value of Update application username on. Your SAML Integration creation page in Okta should now look something like the screen below.
-
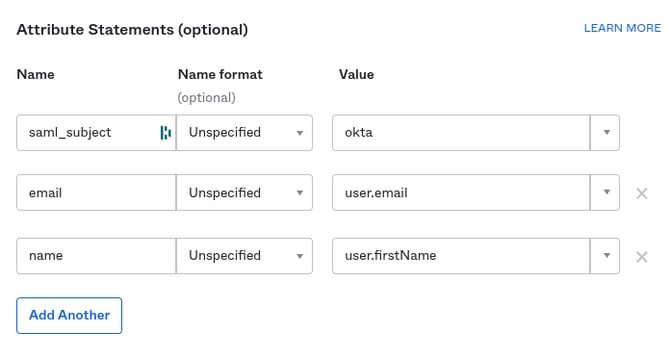
Scroll down to find the Attribute Statements section. You need to map your Okta user attributes to specific fields so that MASV can correctly provision your users.
-
Add two new empty fields, and then fill them out according to the table below.
|
Name |
Name format |
Value |
|
saml_subject |
Unspecified |
Must be okta Be sure to enter this value manually! |
|
|
Unspecified |
user.email (select from suggestions) |
|
name |
Unspecified |
user.firstName (select from suggestions) |
Your attribute statements table should now look something like this:
-
Leave the Group Attribute Statements section empty.
-
Select Next.
-
Select I’m an Okta customer adding an internal app.
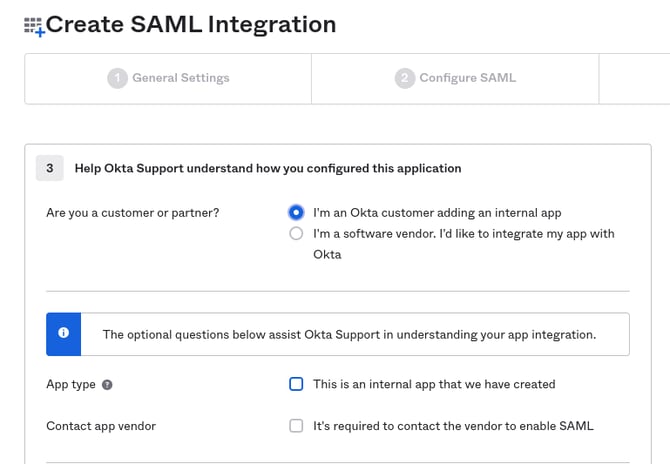
-
Select Finish.
Importing Okta’s Metadata Into MASV
After completing the previous step, the Okta information page should resemble the screen below.

You must now find the XML version of Okta’s metadata and import it into MASV.
To import Okta XML metadata into MASV
-
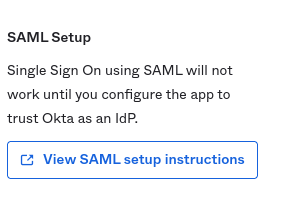
In Okta, scroll to the bottom of your applications page.
-
On the right sidebar, select View SAML setup instructions.
-
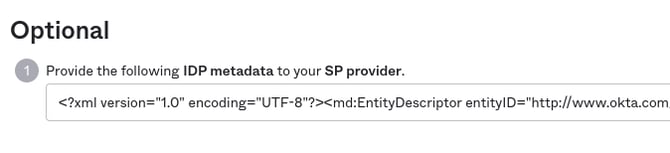
You are redirected to a page titled How to Configure SAML 2.0 for <application name> Application. Scroll down until you see Optional.
-
Copy the XML data from the Provide the following IDP metatdata to your SP provider text field.
-
In MASV, on the SSO Settings page, paste the XML metadata you copied from Okta into the RAW Metadata field that is under SAML Configuration.
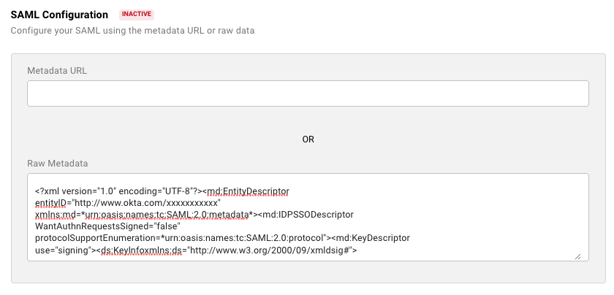
-
In the lower right corner of the SSO Settings page, select Save. If configured correctly, an Active tag appears beside the SAML Configuration heading in MASV.
-
SSO Name now appears in the upper right corner. Enter a name your users will use to sign in your team with SSO. For example, if you enter masv, your users must enter masv as the SSO Name on the SSO sign in page.
-
Select the Enable SSO toggle so that SSO is on.
-
If you want to require users to sign in with SSO, select the Require login with SSO toggle. If you want to allow users to sign in with SSO or email authentication, ensure the toggle is off.
-
Select Save to apply your settings.
Assign users to your application
You must now assign your newly created Okta applications to your users. Okta has a guide for this here. Users your application is not assigned to will be unable to log into MASV with SSO.
Try it out
Navigate to MASV’s SSO sign-in page and enter the SSO name you chose for your team. When you click “Sign in”, you should be redirected to Okta to authenticate. Once you’ve finished authenticating, you should be redirected to MASV.
If you are redirected to the MASV dashboard, great! You can continue using MASV as normal. If you are redirected to a screen prompting you to accept an email invitation, please do so and then sign back in with SSO.