How to render and send project sequences in Premiere Pro
Follow the steps below if you would like to render and send project sequences for a final client delivery:
-
Navigate to the Premiere Pro project you want to send files from, and highlight the files you want to send.
-
Use the Add Item button to add your sequence and any other files you may want to send.
-
Enter the email addresses’ of your recipients, a package name and message, and enter a password if you want to protect the content.
-
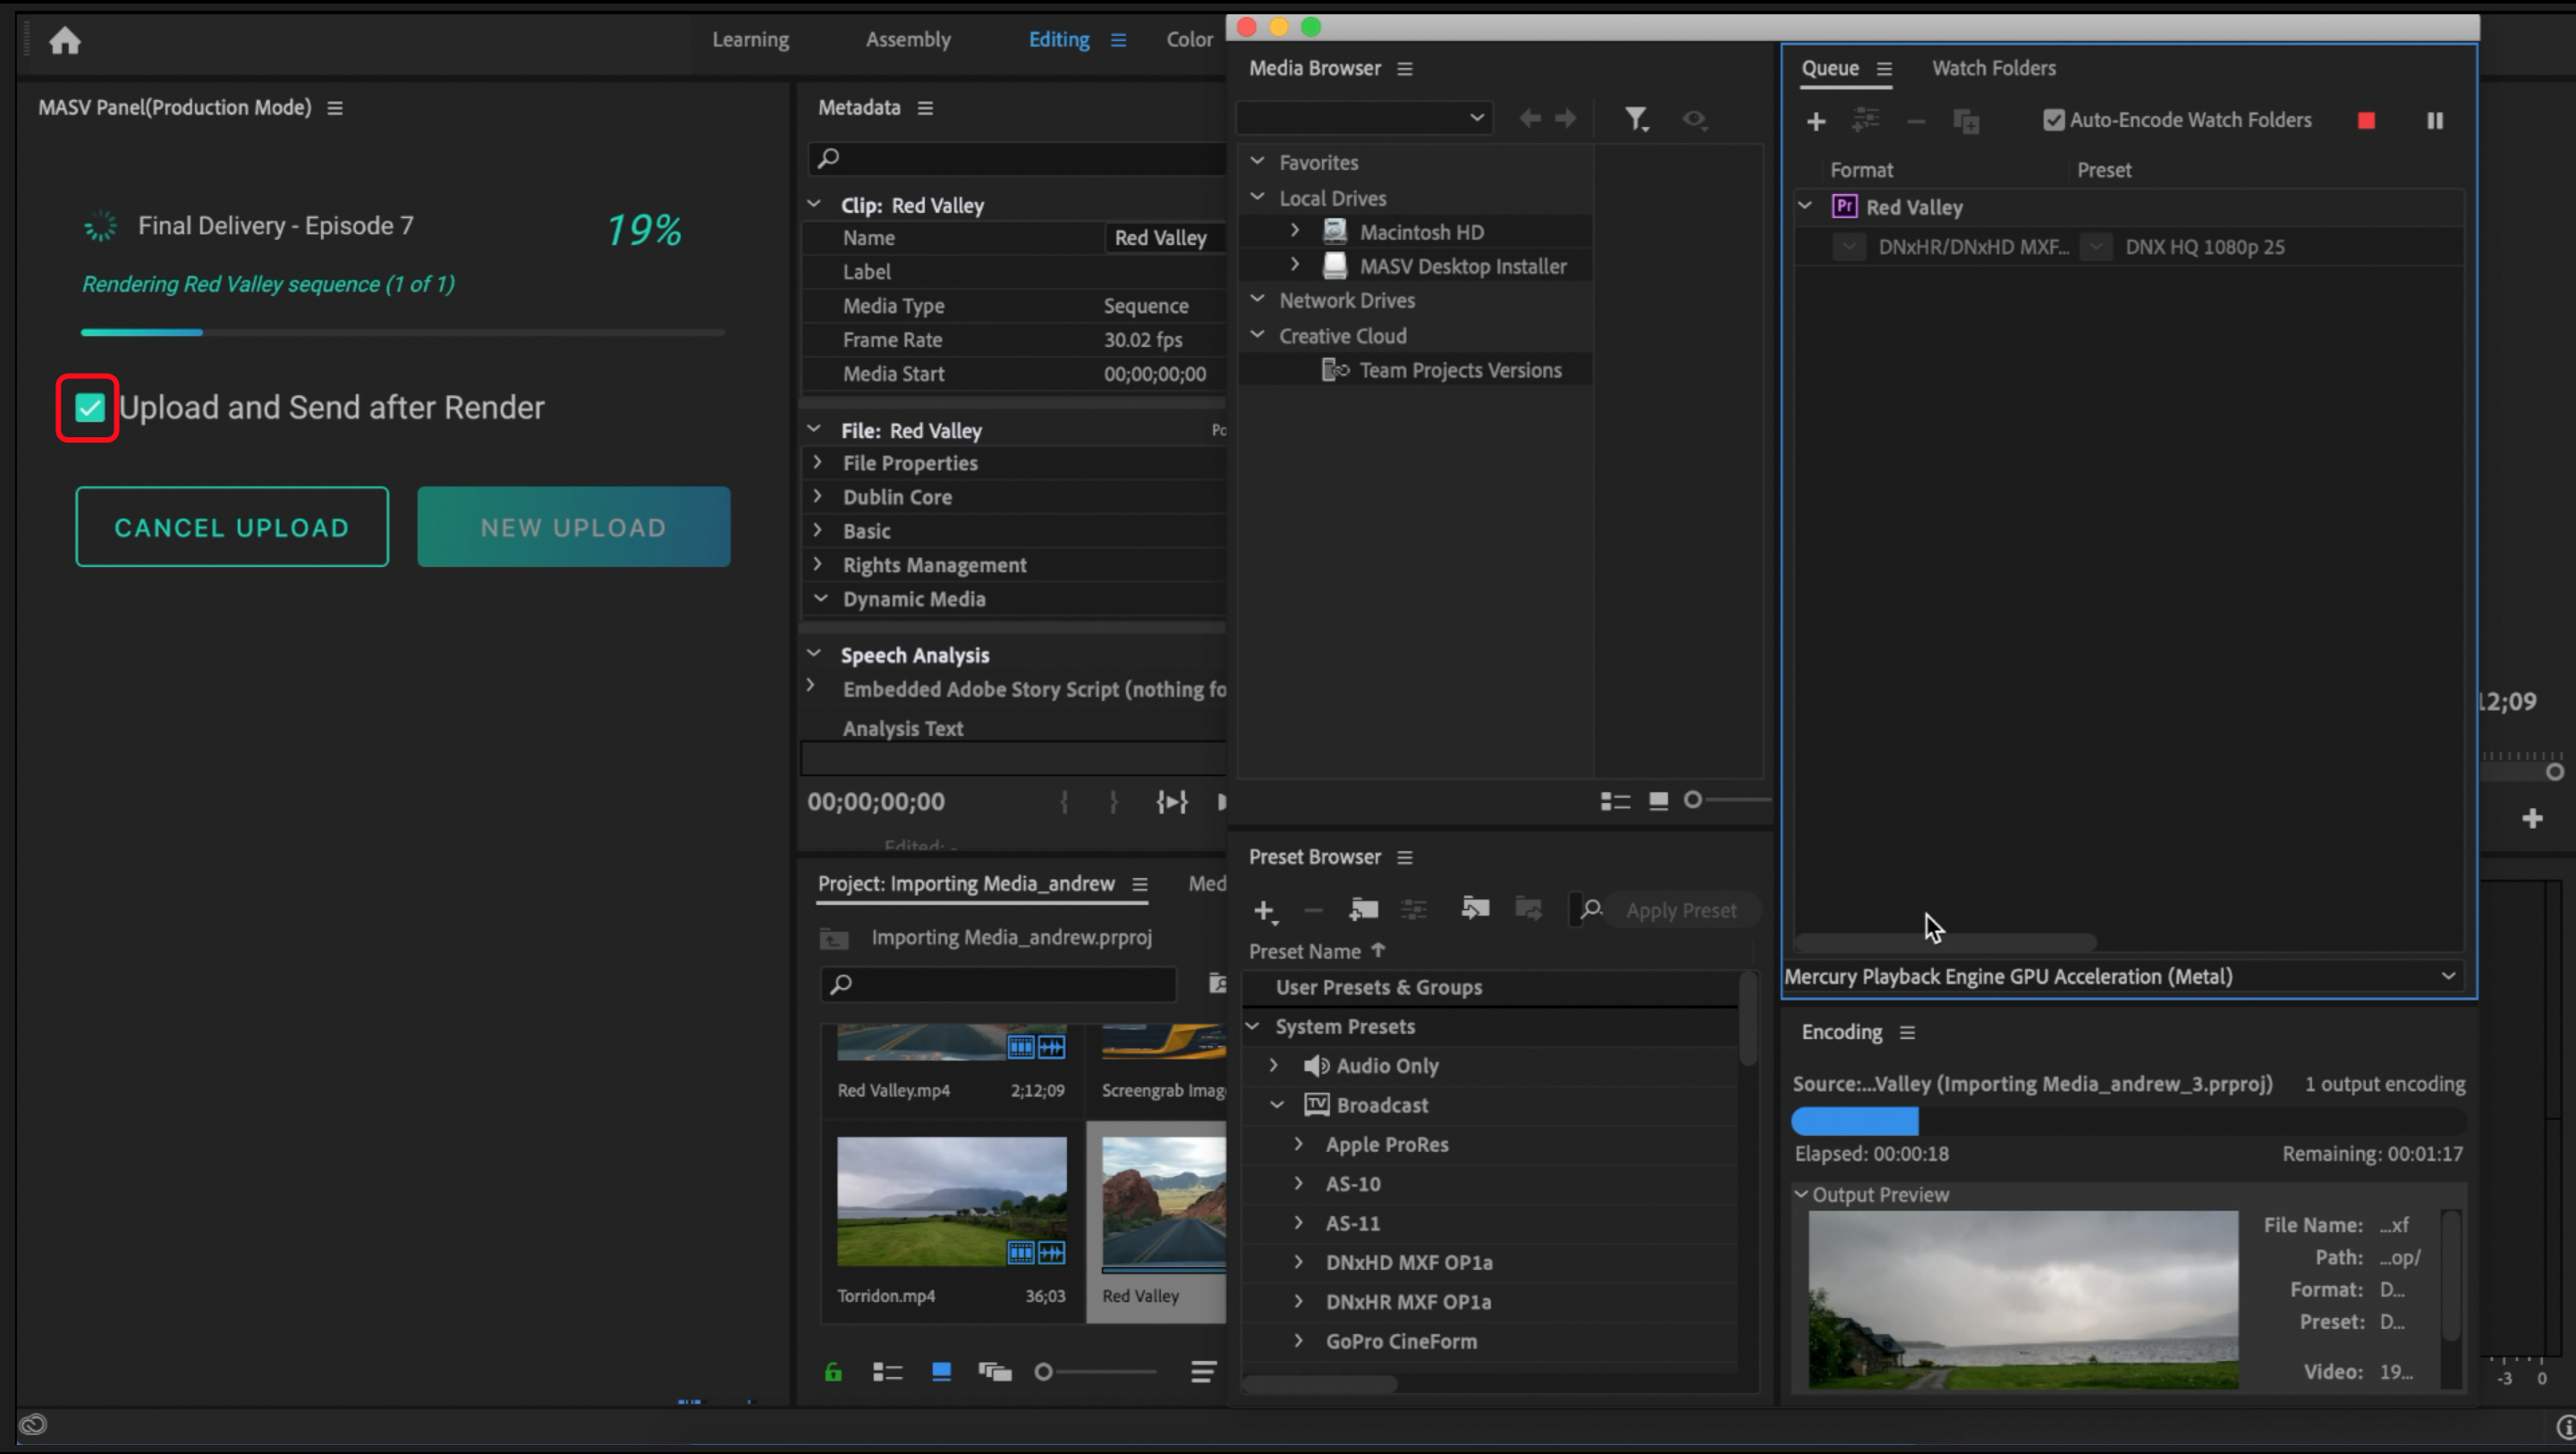
You are presented with two action buttons at the bottom of the MASV Panel: Render OR Render and Send. Select Render if you want to review the rendered file before sending it to your client. Select Render and Send if you want the package to automatically be sent to your client as soon as the render job is complete.
-
When you select either action button, the MASV panel will prompt you to select your preferred Render format. You can ‘star’ your most commonly used render presets, so they’ll appear at the top of the list the next time you need to render and send a file with MASV.
-
Select your preferred output directory (where you want to store the rendered file). When you select the output directory, Media Encoder automatically opens and kicks-off the rendering process.*
-
When Media Encoder completes the render the transfer process automatically starts.
*If you selected Render and Send, but you decide that you would like to review the file before sending it to your client, you can uncheck the Upload and Send after Render button. When unchecked, the render will still complete, but the package won’t be sent to the client until you select the Upload and Send button.