You can connect MASV with your OWC Jellyfish storage system. Jellyfish offers shared storage for seamless collaboration among creative teams. By integrating MASV via the Jellyfish Manager, you can receive and send files from Jellyfish storage using MASV and MASV Portals.

Before you start
-
Ensure you have the required permissions to connect MASV and Jellyfish:
- MASV: You must be a Team Owner, Admin, or Integration Manager.
- Jellyfish: You must be an Admin running Jellyfish Manager 3.1.3 or higher.
-
Know which storage location and directory you want to deliver the files to or from.
To connect MASV with Jellyfish Manager
-
In the MASV Web App, as a Team Owner, Admin, or Integration Manager (role), from the sidebar on the left, select Integrations.
-
On the Integrations page, select the Available Integrations tab, and from the Storage Devices section, select Jellyfish.

-
In the Add Integration window, type a meaningful name in the Connection Name box.

-
In the Transfer Direction area, choose a direction:
-
Save to storage: For inbound files (Write)--MASV transfers files to the connected storage.
- Send from storage: For outbound files (Read)--MASV transfers files out of the connected storage.
-
-
Choose any of the following settings in Folder Options or Source Directories:
- Target Subdirectory (Save to Cloud direction only): To set an optional relative path, type a path in the Target Subdirectory box. You can edit this directory as needed.
- Save directly in upload/target directory (Save to Cloud direction only): If you want to save the files in a directory that uses the package name, clear the checkbox. To deliver directly into the Target Subdirectory, select the checkbox.
- Source Directories (Send from Cloud direction only): To limit access to a specific folder/directory, in Source Directories, type a relative path. You can edit this directory as needed.
- In Sidecar Options, if you are passing metadata to Mimir, enter a Mimir Sidecar Form ID.
-
Select Next.
-
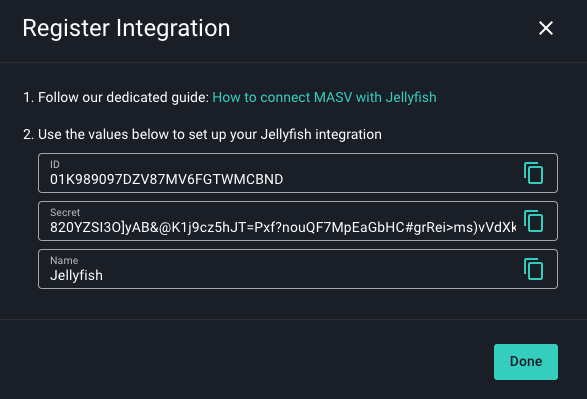
The Register Integration window opens with the ID and Secret you’ll need for the gateway/connection. Leave the MASV browser tab open, and in a new browser tab or window, open Jellyfish Manager.
-
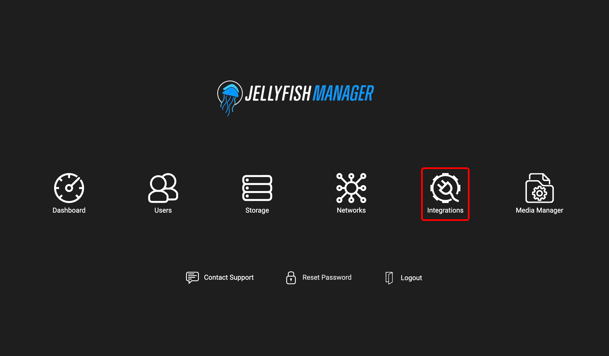
In Jellyfish Manager, select Integrations.
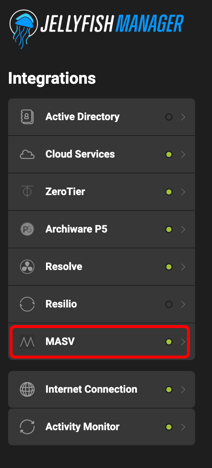
- From the Integrations list, select MASV.
- On the Integrations/MASV page, select the Add Gateway button. The fields required for the connection display.
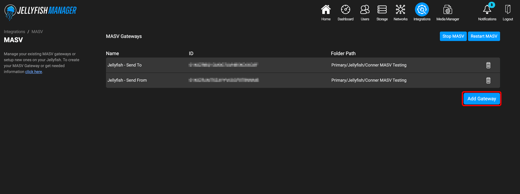
- In the Name box, copy the name you entered in the MASV Web App.

- In the MASV Web App, copy the ID and Secret from the Register Integration window, and paste them into the ID and Secret boxes in Jellyfish Manager.
- In Jellyfish Manager, select the Select Folder Path button, and select the directory where you want to save or access the files.
- Select the Add Gateway checkmark button in Jellyfish Manager to save the connection. A new gateway for MASV will be listed on the page.
 In the MASV Web App, select the Done button to close the Register Integration window.
- On the MASV Integrations page, select the My Integrations tab, and refresh the browser window to confirm that the connection is listed and that the Status column displays the connection as OK.

That's it! Depending on your Transfer Direction, you can now: